DIY Moments: Vol. 16 No. 5
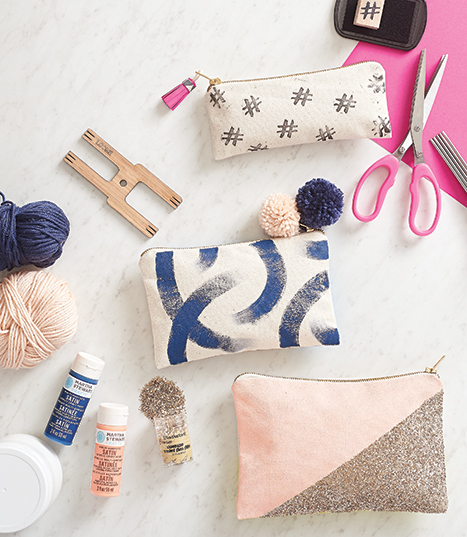
When we added canvas pouches to our collection, we were excited with the challenge of crafting these blank canvases into pouches that matched our personalities. Follow the steps below to transform your pouches into picture perfect accessories or put your own spin on it!