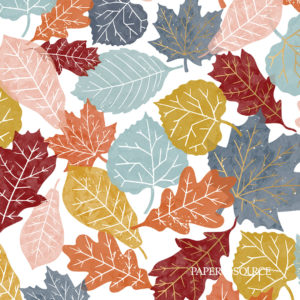
The color of the fall leaves are changing and even dropping to your favorite device! Check out our new PS Designed Wallpaper designed to help us appreciate all the naturally beautiful moments of the season.
The color of the fall leaves are changing and even dropping to your favorite device! Check out our new PS Designed Wallpaper designed to help us appreciate all the naturally beautiful moments of the season.

Come to your local Paper Source for your last bit of crafting before the holidays! Our December workshops lineup are great holiday crafts perfect for both adults and kids. Read below for an overview of each class and visit us online to see more details and reserve your spot now! Make it a happy holiday!
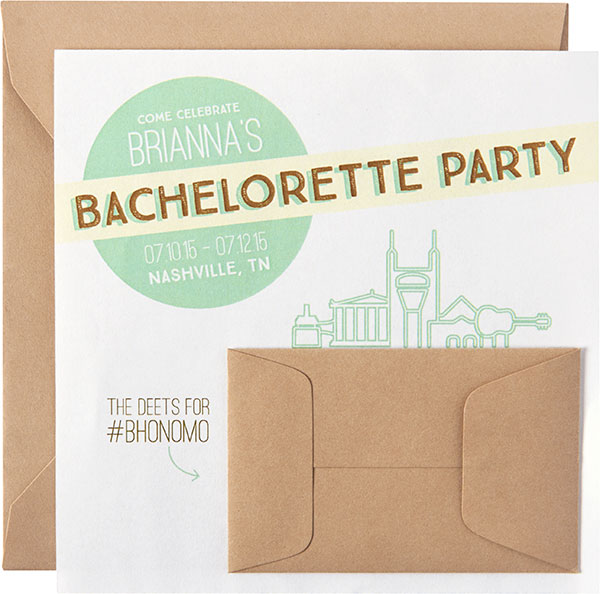
A bachelorette party is a monumental event worthy of some great invitations. Meg K., a designer at Paper Source, planned her friend’s bachelorette party in Nashville. Using Paper Source products (and a whole lot of creativity), Meg fashioned the perfect invitation for an action-packed weekend.
Meg used our Envelope Liner Kit and coordinating Mint & Gold Fine Paper for a pop of color. This was a great way to finish the design with a professional look without breaking the bank.
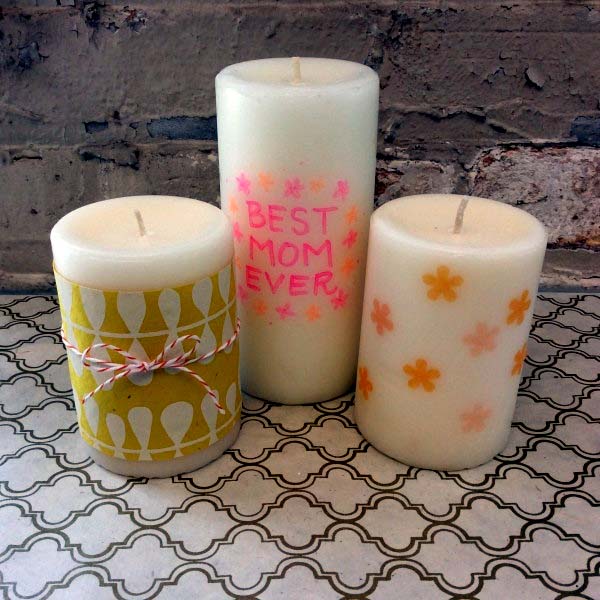
Mother’s Day is a great time to give a personalized and thoughtful gift. We love this candle customization; it’s easy to do for kids and adults, and is the perfect present for the mom who loves to take a bath (consider gifting with bath oils and a good book), or for cute mantel decor.
One of our favorite and simplest ways to get crafty is….with tape! We love washi and paper tape! With these DIY projects, your everyday items will look new, colorful and fun. Washi tape originates from Japan and has a typical masking tape texture, but is far from dull and beige. Washi tape is most often made from the bark of trees native to Japan (this is why some tape that is similar to washi tape is simply called paper tape if it does not come from Japan).
Washi tape can literally be used on anything. It appears delicate but can actually withstand a lot. The best part? If you don’t like where you put it, just take it right off. It won’t damage or leave sticky marks on anything! It is the easiest DIY crafting you’ll ever do, so even if you think you aren’t too crafty this will quickly change your mind.
Tall or short, clear or colorful, empty or full, on paper or in person (or even on a tea towel) – we are crazy for canning jars! These classic jars charm us with their endless possibilities. They are, of course, perfect for canning fruits, vegetables and your favorite jelly or salsa – but if you don’t own a jar wrench yet, there are still plenty of way to express your love for canning!
They make for great storage with our chalkboard stickers or tags.

If you’re looking for a quick and easy idea that still packs a punch, look no further than a roll of paper tape (sometimes called Washi tape). As functional as it is trendy, this removable, repositionable tape adheres to a variety of surfaces, including paper, glass, plastic and metal. Often transparent, this decorative accent will add cool factor to crafting creations large and small.

Add an element of cute class to an upcoming dinner party with these dressy drinks. Create paper parasols with ease with our latest how-to!

We were tickled when this month’s Women’s Day featured a project inspired by red and white paper straws. Remember these straws from our Summer Cup Cover How-To? Well, this holiday variation — cleverly called the Straw-burst Wreath — caused a stir among DIYers.

From picking a turkey to assigning side dishes to cleaning house, few obligations toe the line of exciting and stressful quite as well as hosting Thanksgiving, so — to help you along — we dug up some of our favorite fixings for a grateful table. With the help of a paper kit or one of our Thanksgiving How-tos your guests can savor the color of the season along with the feast.
