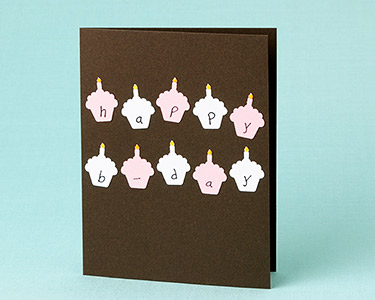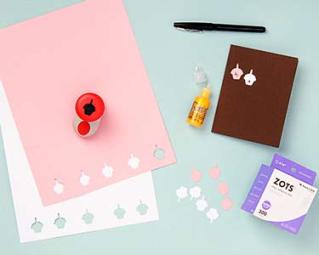
Hole punches are a super easy way to decorate a handmade card or invitation. With this birthday card, we repeated the punch using the cupcake cutouts to create impact with lettering. In addition to the cutouts, you can also use the negative spaces left by the hole punch to create little peekaboo windows into the inside of the card!
 Materials needed:
Chocolate A2 Folded Card
Blossom Cover Weight Paper
Eco-white Cover Weight Paper
Cupcake Hole Punch
Yellow Stickles Glitter Glue
Zots Clear Adhesive Memory Dots, Small
Black pen
Instructions:
1. Begin by punching five cupcake punches from both the blossom and eco-white paper.
2. Using Zots Dots or another adhesive, adhere the 10 cupcake punches to the folded card (aligned vertically), alternating colors to your liking.
3. Once cupcakes are firmly adhered to the folded card, use black pen to write “happy b-day,” with one letter on each punch.
4. Next, use the Stickles Glitter Glue to color the flame of each candle.
5. Finally, personalize a message on the inside of the card and you’re set to send along birthday wishes!
–Annie
PS colors: eco-white & pool
Latest fave: 12″ Guillotine Trimmer — great for cutting large sheets of paper!


That is so cute! I may have to make a card for my daughter’s first birthday–a little keepsake for her. Thanks for the tutorial!
Super cute!I love this so much. I think I’ll try this out! I love shopping on your site…I just bought a few treats! I blogged about it too!
Thanks for the great ideas!
I love the combination of color! Thank you!
This is fantastic!!! Such a great go-to for the many kids bdays we have in our future, and yet personalized, too!
One question.. what marker is good for writing on the inside, since it’s a chocolate colored card?
Good enough to eat!
I like the chocolate colour!!